

Askar SQA55 Imaging Rig vs Seestar S50 Smart Telescope
Two complete astrophotography setups compared: ~€2,700 vs ~€800
Astrophotography has never been more accessible than it is today.
Not so long ago, imaging deep sky objects meant committing to complex equipment, a steep learning curve, and a significant financial outlay before you ever saw a meaningful result. Today, that has changed. There is now a wide range of equipment available that suits very different budgets, experience levels, and ways of working, while still being capable of producing impressive images of the night sky.
This article documents a practical comparison between two complete astrophotography setups, chosen specifically to highlight that shift.
The Target: M51, The Whirlpool Galaxy
For this comparison, the chosen target is M51, the Whirlpool Galaxy.
M51 is an ideal subject for a project like this. It is bright enough to be achievable with relatively small instruments, yet detailed enough to reveal differences in capture, tracking, calibration, and processing. Spiral structure, dust lanes, star colour, and background quality all come into play, making it a revealing and rewarding object for both systems.
It is also a galaxy that many people aspire to image themselves, which makes it a familiar and meaningful benchmark.
The Aim of the Comparison
This is not about declaring a winner.
The goal is to explore the strengths, compromises, and overall experience of two very different approaches to astrophotography. One is a modular imaging rig assembled from individual components. The other is a highly integrated smart telescope designed to remove as many barriers as possible.
Both setups are used on the same target, from the same location, under the same sky conditions as closely as possible. Integration times are matched, and final framing is aligned to keep the comparison fair and informative.
To ensure consistency, the data from both systems is stacked using Astro Pixel Processor, then processed using PixInsight, with final refinement in Photoshop.
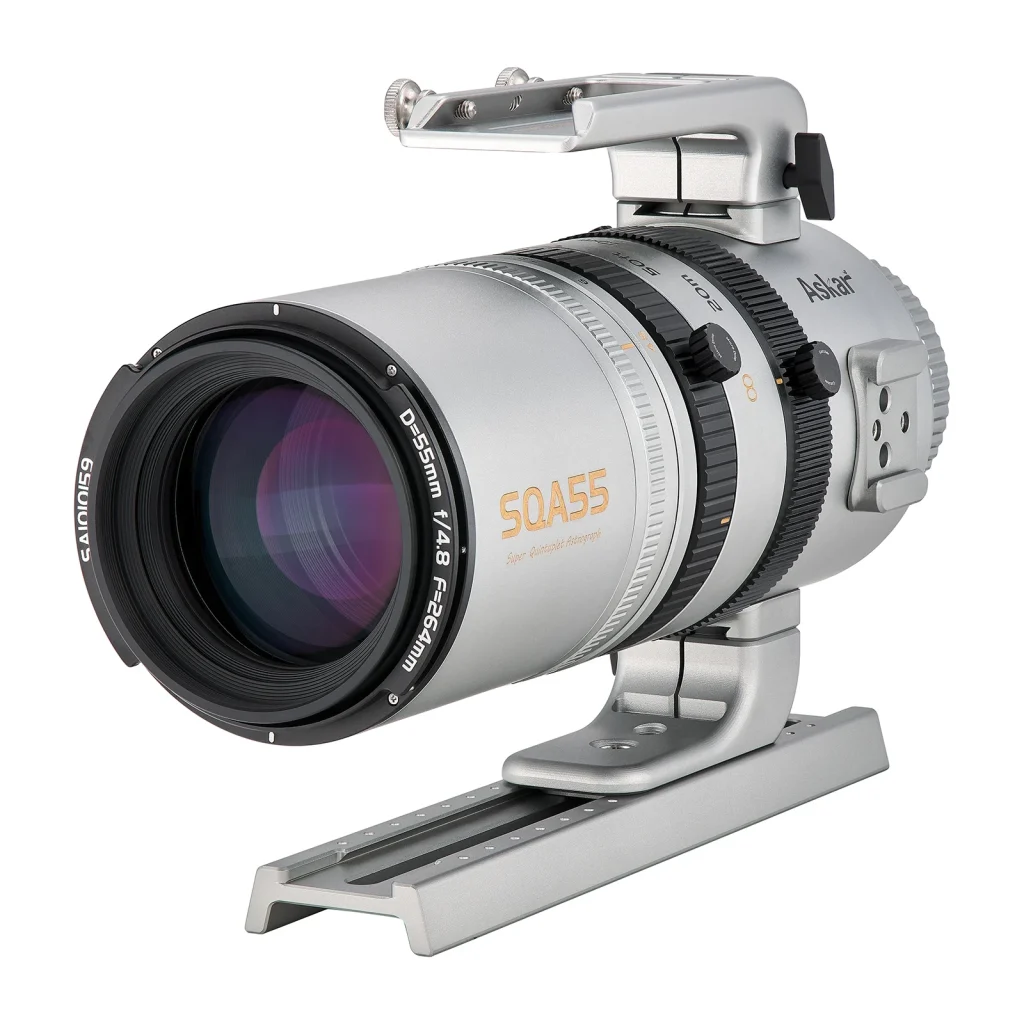
Setup One: Askar SQA55 Modular Imaging Rig
ZWO TC40 carbon fibre tripod, providing a lightweight but rigid foundation suitable for portable imaging.
William Optics equatorial wedge, allowing accurate polar alignment and enabling equatorial tracking.
TeSeek Mini dual axis harmonic drive equatorial mount, delivering precise tracking in a compact form factor without traditional counterweights.
Askar SQA55 55 mm f/4.8 quintuplet Petzval astrograph, with built in field correction for a flat, well corrected image.
ZWO ASI585MC Pro cooled colour astronomy camera, offering a generous field of view and good sensitivity for galaxy imaging.
ZWO ASI290MM Mini guide camera, used to improve tracking accuracy during longer integrations.
ASIAIR Mini, managing mount control, guiding, plate solving, and image acquisition in a compact, low power package.
- Each component can be upgraded or repurposed over time.
- Capture, calibration, and workflow decisions are fully under your control.
- The system encourages learning and experimentation as skills develop.
Setup Two: Seestar S50 Smart Telescope
Rollei C6i carbon fibre tripod, providing a lightweight and portable support platform.
MSM equatorial wedge, allowing the system to operate in an equatorial configuration for improved tracking.
Seestar S50, integrating optics, camera, mount, focuser, and control electronics into a single compact unit.
Alignment, tracking, image capture, and stacking are handled automatically through a mobile app, reducing setup steps and technical overhead.
- Minimal setup and fast time from unpacking to imaging.
- Fewer cables, fewer decisions, and no laptop required.
- A low barrier to entry for people new to deep sky imaging.
A Shared Processing Pipeline
To keep the comparison transparent and grounded, both datasets are stacked using Astro Pixel Processor. Both final images follow the same broad processing workflow in PixInsight, and Photoshop is used for final refinement and presentation. Any limitations imposed by hardware or software are clearly documented rather than hidden.
Why This Comparison Matters
At its heart, this project is about choice.
Astrophotography no longer demands a single path or a single level of investment. There is now equipment available that suits a wide range of budgets, time commitments, and learning styles, and all of it is capable of producing meaningful and rewarding results.
By presenting both the process and the outcomes openly, the aim is to give readers the information they need to decide which approach best aligns with their own goals and expectations.
When the Results Will Be Published
The imaging, processing, and side by side comparisons are currently underway.
The full results, including final images, matched crops, and notes on the experience of using each setup, will be published in mid February.
Once published, everything will be presented openly, including my personal take on the strengths and compromises of each setup, while leaving room for readers to form their own conclusions.
If this is something you are interested in, bookmark this page and check back then. The images, the process, and the practical experience of using both systems will all be there to explore.
Same sky. Same galaxy. Two very different ways to explore it.