Introduction
Weighted Batch Preprocessing (WBPP) is PixInsight’s all-in-one script that calibrates, registers, and integrates your subframes into a clean master light. It might look intimidating the first time you open it, but once you know what to tick and why, it becomes one of the most powerful parts of your astrophotography workflow.
🌌 Why WBPP Matters
WBPP automates three of the most important steps in deep sky imaging: calibration, alignment, and stacking. This is where your raw data is turned into a single, high-quality master. Done properly, you’ll preserve faint detail, reduce noise, and avoid colour issues. Done badly, you’ll lock in problems that can’t be fixed later.
Preparation is everything. Good calibration is half the battle. Skipping or rushing this stage always shows in the final result.
1️⃣ Opening WBPP
In PixInsight, go to:
Scripts → Batch Processing → WeightedBatchPreprocessing
📸 [Screenshot Placeholder – WBPP Main Window]
2️⃣ Adding Your Frames
Lights
- Add all your raw light frames.
- Keep exposures grouped logically (per filter, per night if needed).
- Exposure Tolerance: ~20% if mixing exposure lengths.
- ✔️ Tick “CFA Images” for OSC/DSLR Bayer data.
Darks
- Add matching dark frames (same exposure, gain/ISO, temperature as lights).
- ✔️ Optimise Darks: OFF unless darks are mismatched.
Flats
- Add flats for each filter or setup.
- Include matching flat-darks or bias.
Bias
- Add a master bias or 50–100 bias frames.
📸 [Screenshot Placeholder – Lights/Darks/Flats/Bias Tabs]
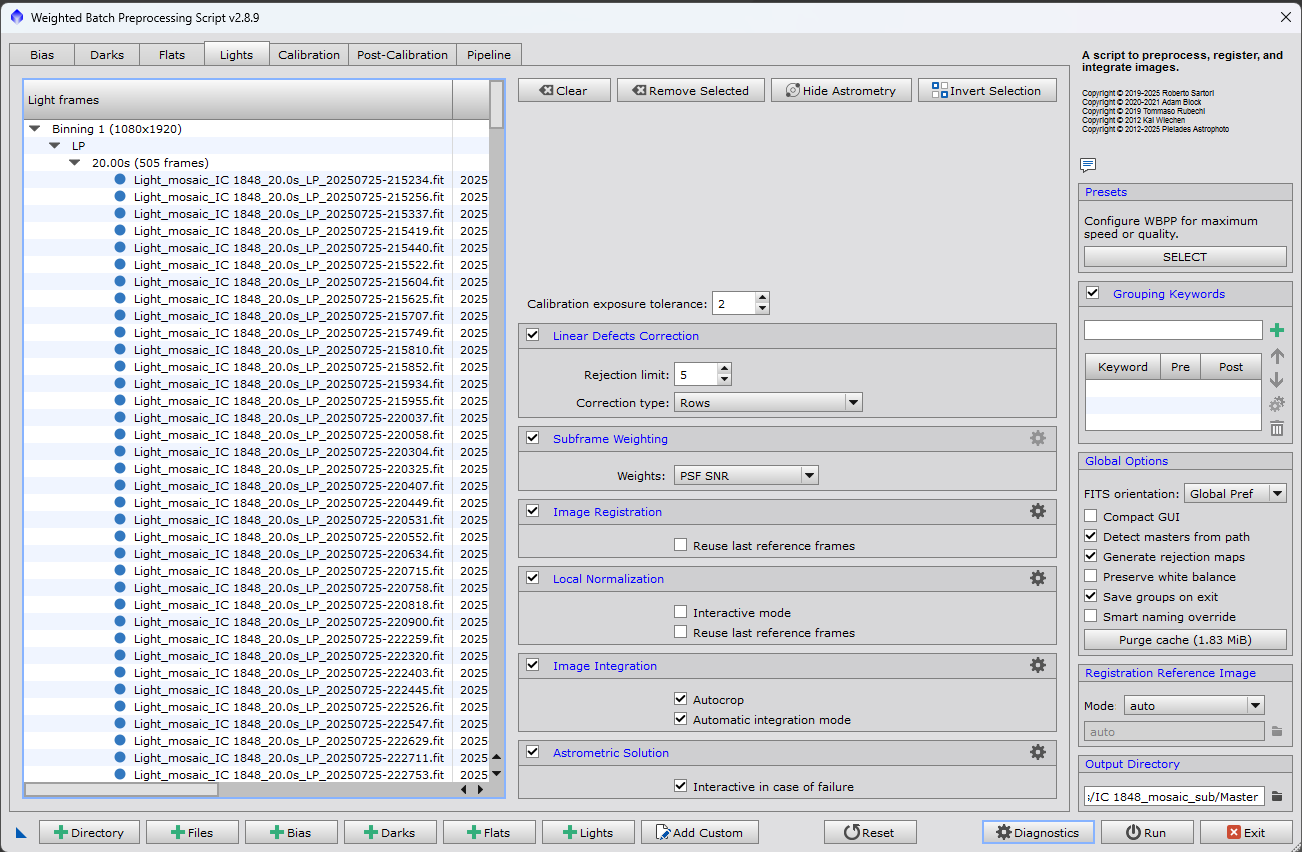
3️⃣ Calibration Panel
- ✔️ Linear Defects Correction: ON (Row Defects set to 5 is a safe default).
- ✔️ Subframe Weighting: ON, set to PSF Signal-to-Noise Ratio.
- ✔️ Image Registration: ON (Auto unless you want to manually pick a reference).
- ✔️ Local Normalisation: ON to even out gradients.
- ✔️ Image Integration: ON.
- ✔️ Astrometric Solution: ON to embed WCS metadata.
📸 [Screenshot Placeholder – Calibration Tab]
4️⃣ Post-Calibration Panel
- ✔️ Debayer: ON for OSC/DSLR (Combined RGB).
- ✔️ Drizzle Integration: OFF unless you are undersampled and have dithered frames.
- If enabled, tick “Generate Drizzle Data” and use Scale 2×.
- ✔️ Fast Integration: OFF for production runs (OK for quick testing).
📸 [Screenshot Placeholder – Post-Calibration Tab]
5️⃣ Pipeline Panel
- ✔️ Active Steps: Tick all except “Event Script” unless you use custom automation.
- ✔️ Generate Rejection Maps: ON.
- ✔️ Preserve White Balance: OFF for neutral calibration.
- ✔️ Detect Masters from Path: ON if you have pre-made masters.
📸 [Screenshot Placeholder – Pipeline Tab]
6️⃣ Integration Panel
- ✔️ Combination: Average.
- ✔️ Rejection Algorithm: Winsorized Sigma Clipping (best all-round choice).
- For fewer than 10 subs: Linear Fit Clipping or Percentile Clipping.
- ✔️ Large-Scale Pixel Rejection: ON to remove satellite trails and gradients.
- ✔️ Sigma Low / High: Defaults of 4.0 / 3.0 are a safe starting point.
📸 [Screenshot Placeholder – Integration Tab]
7️⃣ Running WBPP
- ✔️ Set an Output Directory with enough free space.
- ✔️ Run Diagnostics first to catch missing calibration frames.
- ✅ Click Run and let WBPP process your data.
✅ Minimum Viable Setup
If you only have lights and darks:
- Load lights and matching darks.
- Leave flats and bias empty; WBPP will skip them.
- ✔️ Tick “Optimise Darks” if you don’t have bias frames.
- Expect more vignetting and noise, but you’ll still get a usable master.
🚀 Advanced Setup
For full calibration:
- Use lights, darks, flats, and bias frames.
- Enable Local Normalisation and Drizzle if you have undersampled data and have dithered.
- Inspect rejection maps to verify calibration quality.
🛠️ Troubleshooting
My master looks noisy
- Add more subs; noise drops by √N.
- Check darks and bias match your lights.
My stars are doubled or blurry
- Registration failed. Pre-select the sharpest sub as a reference frame.
- Remove bad subs in Blink or Subframe Selector.
Flats didn’t correct vignetting
- Flats must match the optical train exactly.
- Include bias or flat-darks to calibrate flats properly.
WBPP crashed or stopped
- Check the log files in the output folder.
- Common causes: mismatched CFA settings, missing calibration, path errors.
Rejection maps look strange
- Lower Sigma Low/High to avoid rejecting good data.
- Check for hot pixels or cosmic ray contamination.
📌 Key Takeaways
- Good calibration is the foundation of a clean master.
- Always inspect your frames before WBPP to avoid stacking bad data.
- Darks are the bare minimum; flats and bias significantly improve quality.
- The principles here apply to other stacking software too (APP, DeepSkyStacker, etc.).
✅ WBPP Settings Cheat Sheet
Lights Tab
- Add all light subs
- CFA Images (if OSC/DSLR)
- Exposure Tolerance: 20%
- Subframe Weighting: PSF SNR
Darks Tab
- Matching darks (same exp/temp/gain)
- Optimise Darks: OFF (ON only if mismatched)
Flats Tab
- Matching flats per filter/setup
- Flat Darks or Bias included
- Auto-Scale Flats: OFF
Bias Tab
- 50–100 bias frames or master bias
Calibration Panel
- Linear Defects Correction: ON
- Subframe Weighting: ON (PSF SNR)
- Image Registration: ON
- Local Normalisation: ON
- Image Integration: ON
- Astrometric Solution: ON
Integration
- Combination: Average
- Rejection: Winsorized Sigma Clipping
- Large-Scale Pixel Rejection: ON
- Sigma Low/High: 4.0 / 3.0
Minimum Setup
- Lights + Darks only
- Optimise Darks: ON if no bias present
Advanced Setup
- Lights + Darks + Flats + Bias
- Drizzle Integration: ON (if undersampled & dithered)
Preparation is half the battle – clean calibration equals clean masters.